Final darkroom prints from Kodak BW400CN

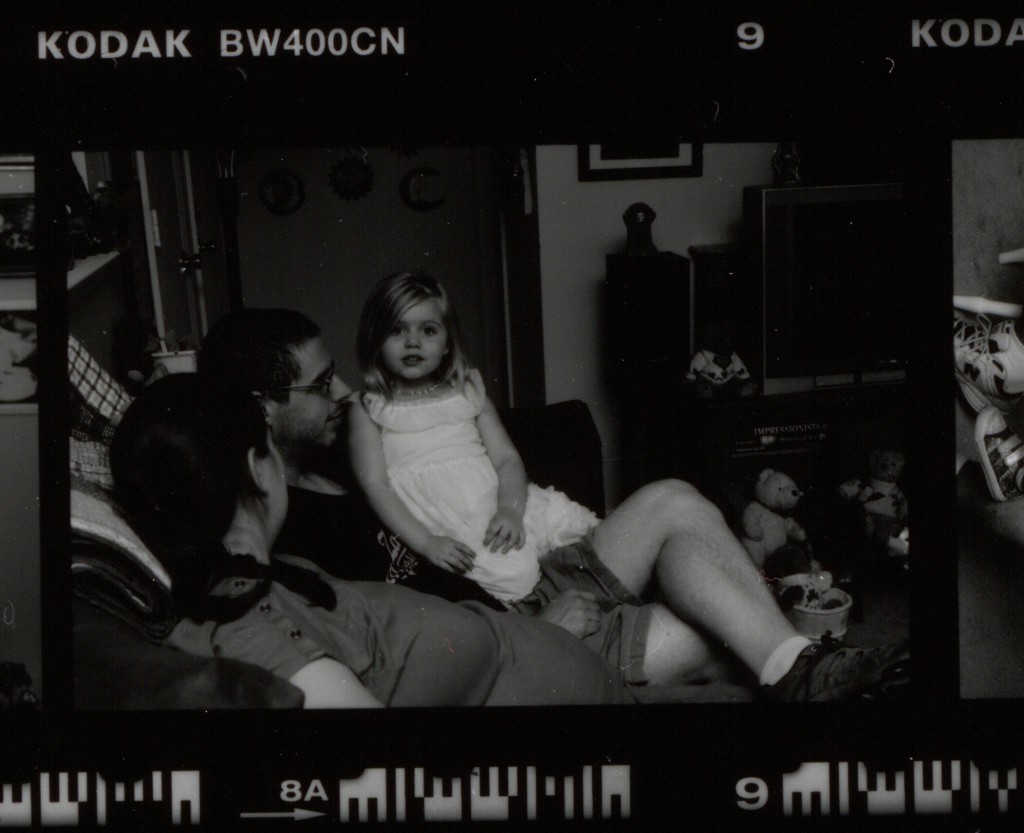
I fought the neg and the neg…hang on, *I* won!

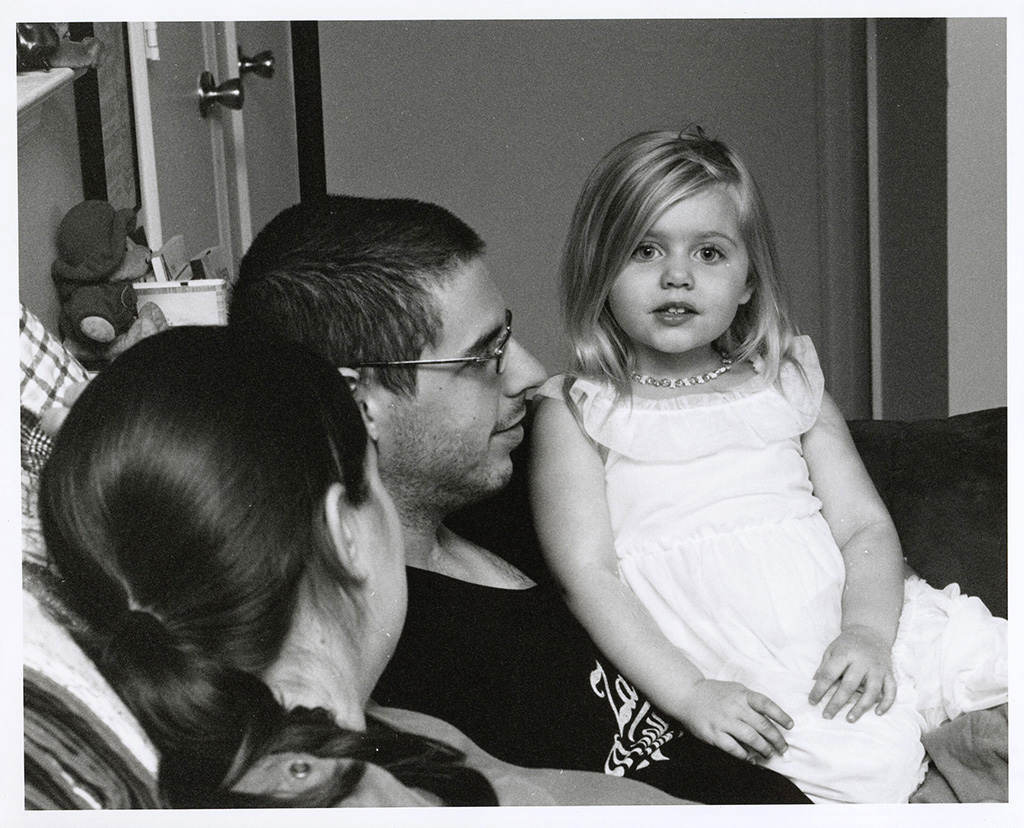
I am pleased to report success in my attempt to make a good final print from Kodak’s BW400CN chromogenic film. Note I said “final” and not “fine”; quite aside from the fact that I’m nowhere near experienced enough at this to claim anything I produce is a “fine print”, there can be no mistaking this for a fine print. But it’s a decent print, more than adequate for the purpose I have in mind.

Final print - BW400CN negative

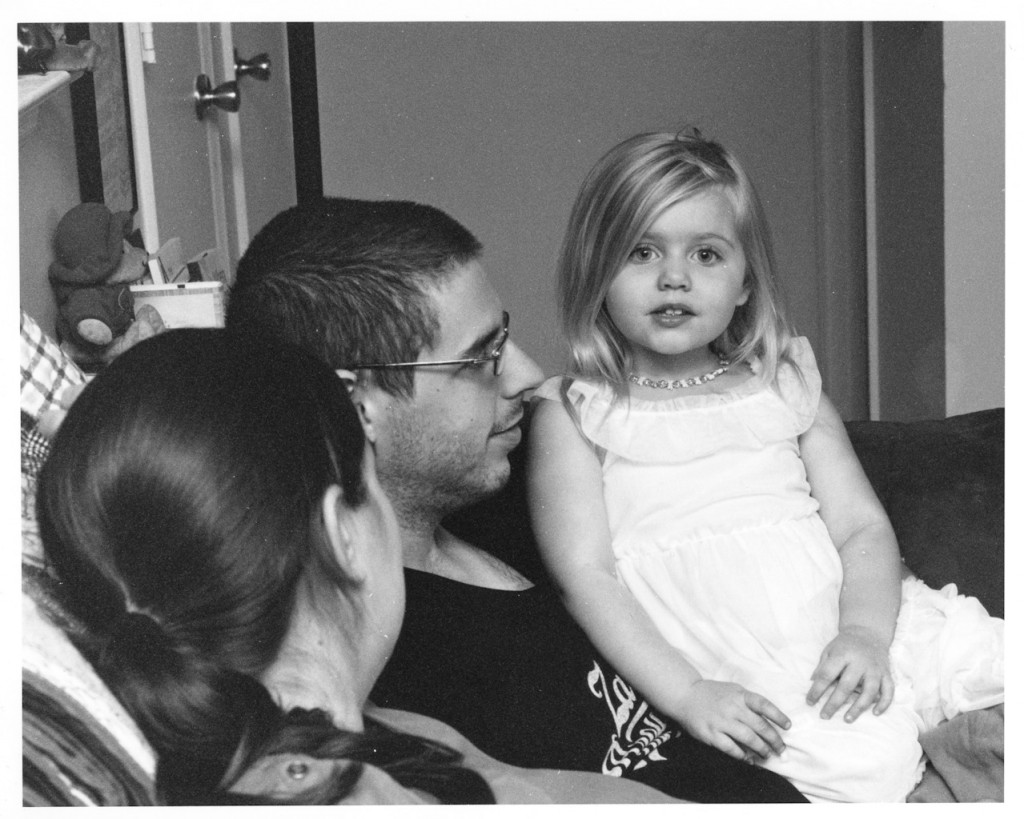
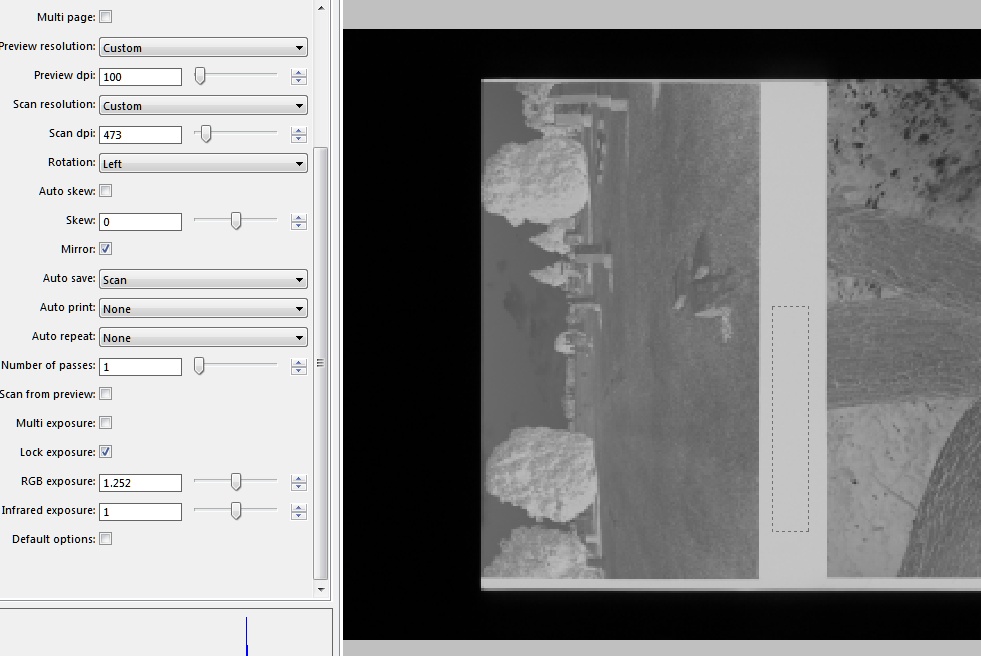
One of the three final prints I made. You’ll notice it needs spotting; the negative has a whole lot more crud on it than my regular B&W do, and the magnification level needed for this crop really didn’t help. That’s an easy fix, if somewhat time consuming.

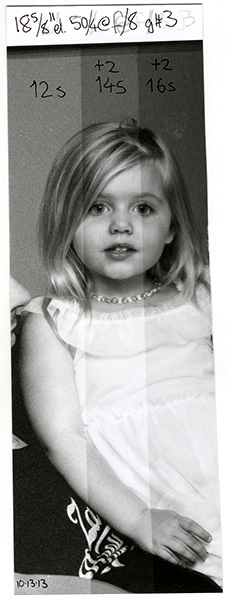
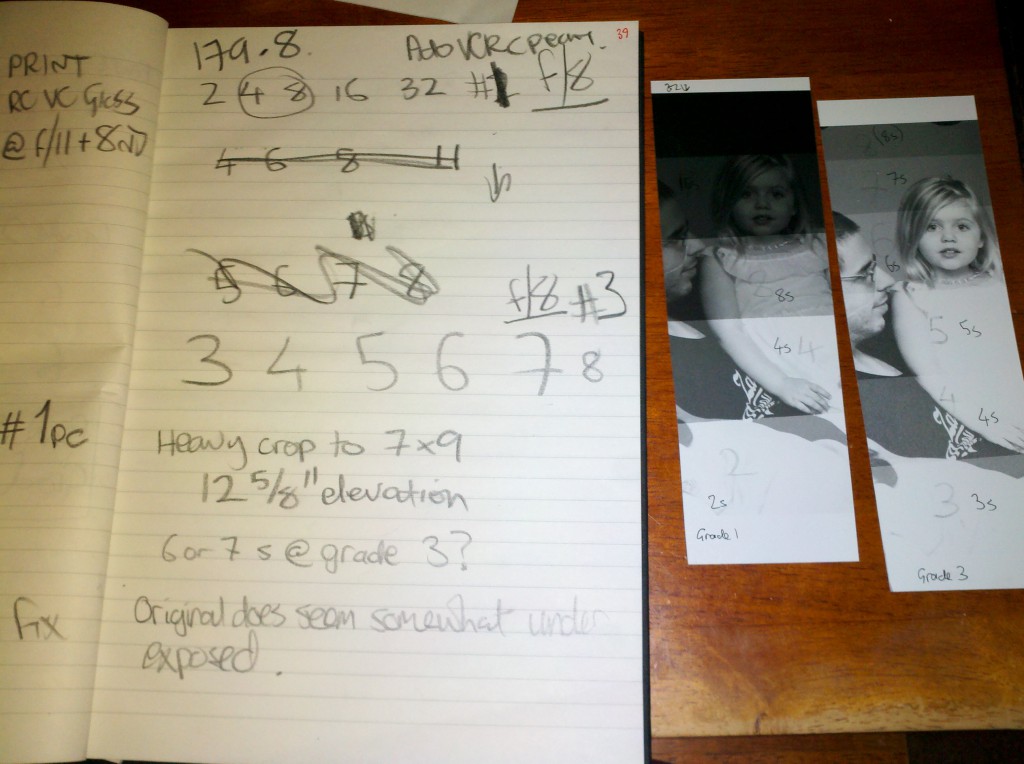
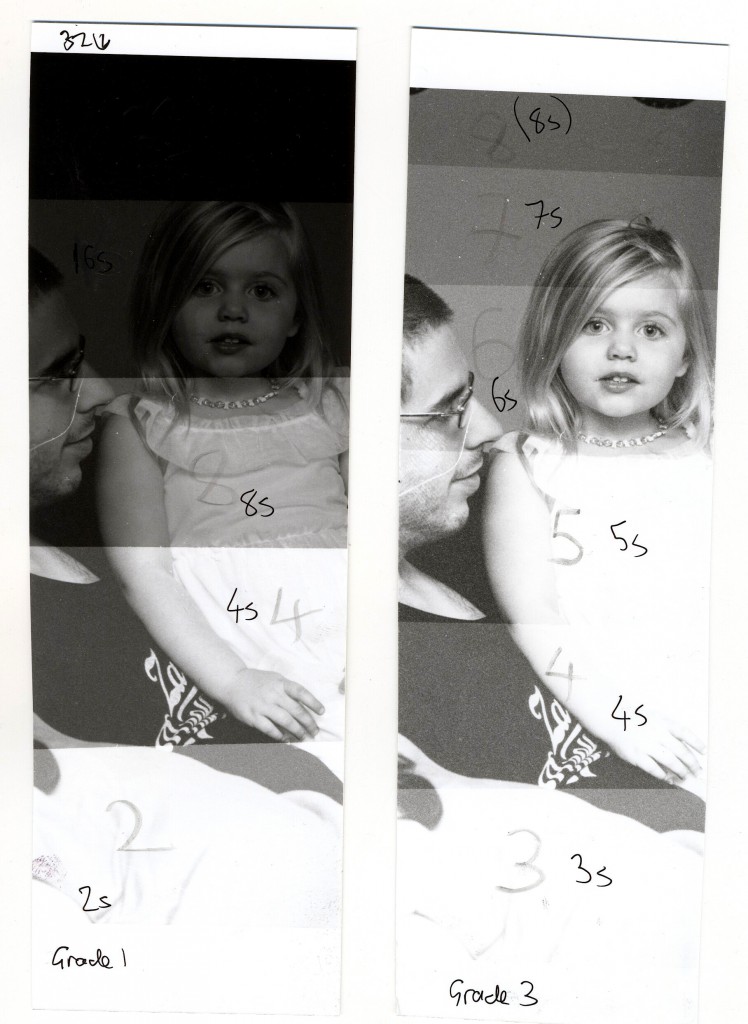
I ran a quick test giving it 15 seconds of exposure instead of 14. That’s not a very big increase, but it did make a subtle improvement to the detail on the white dress. It had no noticeable effect on the shadows and an almost imperceptible darkening of the midtones. That’s close enough to what I wanted, so that’s the time I exposed the three final prints for.

When I do multiple prints, I’ll expose them all one after the other, storing the exposed paper in a left over lightproof bag from a used package of paper just to ensure they don’t accidentally get fogged. Then I run them sequentially through the trays.

In this case, the sequence was:

Print 1: 1 minute in developer, 30 seconds in stop, 1.5 minutes in fixer.

Leaving print 1 in the fixer, I start on print 2: again, 1 minute dev and 30 seconds stop. At this point, I move the first print out of the fixer (it’s been there 3 minutes by now) and into the water soak tray. Print 2 goes in the fixer for a minute and a half, and then I repeat the sequence with print number 3.

Once print 2 has joined 1 in the water tray, print 3 goes in the fix bath for 3 minutes, matching the first two. It then joins them in the soak tray.

At this point, I quickly return chemicals from the dev, stop and fix trays to their bottles and rinse out those 3 trays. I’ll be using them to wash the prints.

Washing is done with a print per tray, fill tray 1, then 2, then 3. Dump tray 1 and refill, do the same for #2 and #3. Repeat the sequence for 6 cycles of fill and dump, then hang the prints to dry. It sounds much worse than it is.

I am very happy with the result, though the prints do need spotting. My C41 is never, ever as clean as my traditional B&W negatives and there was a lot of magnification, so much so that were I to have printed the full frame instead of cropping, it would have needed 16×20 paper to fit. I’m impressed by the sharpness and grain considering that it’s 400 ISO film and was underexposed a stop or more to boot. The magnification does mean that any dirt or dust is that much more obvious, too. I’ll be examining how to deal with that problem in a near future post.

I’m not going to pass final judgement until I try a less-magnified enlargement from a properly exposed BW400CN negative, but on the strength of this result, I’ll certainly be taking that step at some point with some existing negatives which are worth a “fine” print.

That said, I wouldn’t ever choose to shoot BW400CN with the intent of enlarging it optically. This is by far the most grungy negative I’ve had to deal with, even though it was processed exceptionally well by a reputable pro lab; it’s the first print I’ve made where I knew I would have no choice but to spot every single print. Oh, joy. Gotta learn that skill, though, so now is as good a time as any. Also, it is a peerless pain in the ass to focus. Granted, the focus rails on my 23CII are in need of some TLC and could be smoother in operation, but this was orders of magnitude harder to properly focus than even the fine grain of Acros or Pan F+. It just doesn’t snap into focus the way traditional silver grains do.

There are just too many “gotchas” involved here to make it worth doing as a matter of routine.

Exploring film base consistency

Err, what?

When making contact sheets, you want to keep things consistent. Film base exposes to just shy of black on the paper and highlights fall wherever they will at grade 2. That informs you whether you blocked up shadows or not, and what might be a reasonable contrast grade to use for a fine print.

Yes, but…what?

The film base (or more accurately, base plus fog) represents the absolute lightest shade on the film. No exposed part of the film can be lighter, and consequently no part of the print can be darker than the film base.

So film base plus fog is important in making contact sheets. I really, really don’t want to have to run a test strip every time I make a contact sheet. This is not the “fun” part of darkroom work any more than making digital contact sheets was fun. It’s a necessary step, that’s all, and having to run a test strip every time just makes it even less fun (I have nothing against test strips, I enjoy that part of the printing decision-making process, picking my area of interest and wrestling the tones into place. It’s a challenge, unique to every negative and paper combination. Contact sheet test strips, on the other hand, are not a challenge. Expose expose expose expose develop which strip is most black? No artistic interpretation required. At all.)

Anyway, my point: if I can keep things as consistent as possible where the film is concerned, I can keep my contact sheets consistent without having to test constantly to find the right time. One exposure to rule them all, and in the darkroom, bind them.

I love both Tri-X and Ilford HP5+. Visually, it has always seemed that while my HP5+ has very consistent base tone, my Tri-X can get a bit…variable. My process isn’t that wobbly. Really. Now I don’t have a fancy densitometer, but I do have a film scanner and Vuescan (which has an exposure lock feature intended to set exposure off the film base).

Ghetto Densitometer

Using VueScan to measure base+fog on a strip of film. Note the selection area and the “RGB Exposure” lock settings on the left side. All 5 rolls of HP5+ were within a couple of hundredths of this one. Tri-X varied more but not enough to warrant testing every time.

So I used what I had, like the resourceful little maker I am.

I found that the 5 rolls of HP5+ I tested were incredibly similar. This is despite their being developed at various temperatures in the 70-74F region, with times I was still trying to decide on. They were all fixed in Kodak Hardening fixer (not recommended BTW with HP5+ unless you enjoy reverse cupping, I guess Ilford recommend non-hardening fix for a reason!)

The Tri-X, by comparison, had much more variation, though still within a narrow enough range that I’d be OK using the same exposure time.

Trimming Practice

It’s hip to be square, or so they say. At least that’s what I keep telling myself as I work with 6×6 and enjoy the difference in compositional technique compared to rectangular formats.

Now I don’t always print square, but for the photos I would declare as “fine art”, square is apt to be my default. I’m a semi-generalist where photographic subject is concerned, but it’s all tied together by the common elements of black & white and the square format.

That makes my usual print sizes somewhere in the 7.5 x 7.5 and 10.5 x 10.5 region (on 8×10 and 11×14 paper respectively). The work prints on 8×10 get filed as-is, with notes scrawled in tiny text using a 0.1mm technical pen in the wide bottom margin. Final prints get a slightly wider bottom margin to allow a signature but need to be trimmed down to size.

Which is where I’ve run into problems, but fortunately they’ve been easy to fix. Continue reading

Printing Kodak BW400CN in the darkroom: a work print emerges

Following on from the previous darkroom session, I needed to make one final test strip and from there, make my first work print from a BW400CN negative (and a badly exposed one at that). As usual I entered the darkroom with a rough plan of action:

Darkroom notes for the final test strip and first work print.

Darkroom log, stardate 101313. More cropping and a slightly larger image area means a higher elevation on the enlarger head, which needs to be compensated for. Also, see where I wanted to make my test strips compared to the actual strip.

To help confuse matters, I had decided I needed a much tighter crop on the area of interest than I had set up in the first couple of test strips. This would mean raising the enlarger head to increase magnification. The wrinkle here is that changing magnification affects exposure. There is always the same amount of light passing through the lens at a given aperture, but as the image is made larger or smaller on the easel, that light is spread out over a larger or smaller area. Lower magnification = more light concentrated on a given spot, higher magnification means the opposite.

So, my exposure time would increase, but by how much? Well, if you’re just moving between standard sizes while keeping the same crop, it’s quite easy, each size step is one stop of exposure. 2″ at 4×6 would be 4″ at 5×7, 8″ at 8×10, 16″ at 11×14 and 32″ at 16×20, assuming no other variables change.

But what if you change the size arbitrarily, as I just did? Well, fret not, for there is an equation for that. Actually there are two, but the one I used is the one which uses enlarger elevation for the calculation.

New_time = (old_time / old_height2) X new_height2

In my case, I knew that a time of about 6.5 seconds might be about right for the old enlarger height setting (12.625″) and f/8, so I made the adjustments I needed to the image crop on the easel, then checked my new height: 18.625″. The Beseler 23C series makes this a breeze, as it has a height scale on one of the vertical supports. Just read the scale and note it down (my ex-high school example did come with the pointer missing, nothing a bit of matboard cut into a triangle couldn’t deal with though).

So my equation looks like (6.5 / (12.625 * 12.625)) * (18.625 * 18.625) and spits out a new time a fraction longer than 14 seconds.

Taking this and running with it, I went 2 seconds either side, for a 12/+2/+2 test strip sequence. I was able to position the strip so that I had a whole tonal range covered, from white areas I wanted to retain detail in through to dark areas I wanted right on the edge of full black. The resulting test strip looked like this:

Third test strip

The third and decisive test strip. Exposures of 12, 14 and 16 seconds taking in the entire tonal range of interest. 14 seconds looks best to me. Also, when I was moving the masking card to cover the middle strip and make the final +2 seconds of exposure, I must have jogged the paper slightly in the easel (or bumped the easel), the effect that caused is most visible in the hand at bottom right.

As soon as I pulled the test strip out of the fixer tray and hit the main room lights, I knew 14 seconds would be the first work print’s exposure time. Sometimes you just know it right away.

So that’s what I did, and here’s the work print I ended up with.

Work print 1Not too shabby for a straight print from a type of negative which is not strictly intended for easy darkroom printing. I’m on the fence over whether it might benefit from about 1 second more of exposure time or not, but, ya know, it’s not meant to be a fine art print and under typical room lighting it looks good; for the purpose I have in mind, it will be ideal.

Test Strips – Darkroom printing from Kodak BW400CN

In part 1, I made a contact sheet at grade 2 from a roll of Kodak BW400CN. Results were good enough to suggest a printing attempt would be worth pursuing.

I chose this frame from the other roll I made contact sheets from:

Scan-131010-0002

It’s underexposed and low in contrast with shadow tones smushed together in the darkness and very depressed highlights. I was bouncing flash over my shoulder, and while the flash insisted it was successfully exposing with its little green “yeah I’m good” lamp, I have to wonder if I didn’t have the thing set wrongly. That, or the white dress was really throwing the auto-thyristor circuitry for a loop.

Anyway, focusing this was kind of tricky. Those chromogenic dye clouds don’t pop into focus nearly as well as the grain on traditional black and white films. But still, it can be focused.

Having no idea at all where to start with exposure, I picked an arbitrary f/8, grade 1 and whole stop increments from 2 seconds to 32 seconds. A whole stops strip is intended only to get into the neighborhood of a useful exposure time and contrast grade or else tell me I’m way off and need to change the lens opening or adjust neutral density filtering. With most B&W films I find myself having to add neutral density into the light path to get manageable exposure times without leaving that warm and not-fuzzy f/8-f/11 comfort zone, but given how dark the mask is on BW400CN I skipped the ND entirely. I also chose to use some of the Adorama VC RC Perle paper which is a bit more than a stop faster than MGIV, plus I have 5 sheets left which I need to get used up before I standardize fully on MGIV.

Anyway, in making a whole stops sequence, I start with my base exposure, in this case 2 seconds. I cover the first part of the paper with a card and expose for the same as the base time, another 2″. The exposure time is doubled for each subsequent segment of the test strip.

So, in this case, my sequence was 2, +2, +4, +8, +16. Segment 1 gets 2 seconds. Next gets 2+2 (4). Next gets 2+2+4 (8), then 2+2+4+8 (16) and finally 2+2+4+8+16 (32).

Darkroom log

This may look like a mess, but it does have meaning. It’s written big and heavy using 6B graphite because I have to be able to read it in dim red safelight conditions, so big and bold is the order of the day here.

The first test strip suggested grade 1 and 4-6 seconds would be a good starting point for some fine tuning on the highlights, but not even close to contrasty enough for decent blacks, so I made a (rash?) leap, changing the grade and calculating a corrected exposure to bracket around, rather than bracketing another strip at grade 1.

Because I was cheap and picked up a set of ancient Kodak Polycontrast filters in lieu of Ilford Multigrades, each grade requires some exposure compensation. For now, I work with the numbers I found online, which suggest my jump from grade 1 to grade 3 requires a correction of 1.33 times the grade 1 exposure time for the same highlights (a separate post awaits regarding these filters). That would put my ideal exposure in the range of 4*1.33 to 6*1.33, or about 5.5-8 seconds.

Test Strips from BW400CN

On the left, my initial try at grade 1, in whole stops on a 2-4-8-16-32 second sequence. On the right, a grade 3 sequence centered around what I calculated to be the right starting point, 3-4-5-6-7-8 second sequence. Made on Adorama VC RC Pearl paper, EL-Nikkor 50/4 @ f/8.

Well, well. Looks like 6 seconds could be close to the cheese here. Also, surprisingly grainy (but not unpleasantly so), probably due to the underexposure combined with cropping somewhat heavily into the 35mm frame.

My next darkroom session will extend on this result, starting with a grade 3 f/8 exposure sequence of 6, 6.5 and 7 seconds (or more likely, f/11 and 12, 13, 14 seconds) with strips running top to bottom so as to get the white dress, skin tones and some of that black t-shirt in the test zone. I really should have concentrated on that area for these first tests. If I had done that I’d have much more useful information on those critical 6 and 7 second segments, as it is they show little to no highlight areas of interest. Oops.

The result of that test strip will inform a first work print, which will give me some idea as to whether dodging or burning is called for, or if trying to print from BW400CN is just a blockheaded notion doomed to certain failure. More to come…