Following on from the previous darkroom session, I needed to make one final test strip and from there, make my first work print from a BW400CN negative (and a badly exposed one at that). As usual I entered the darkroom with a rough plan of action:
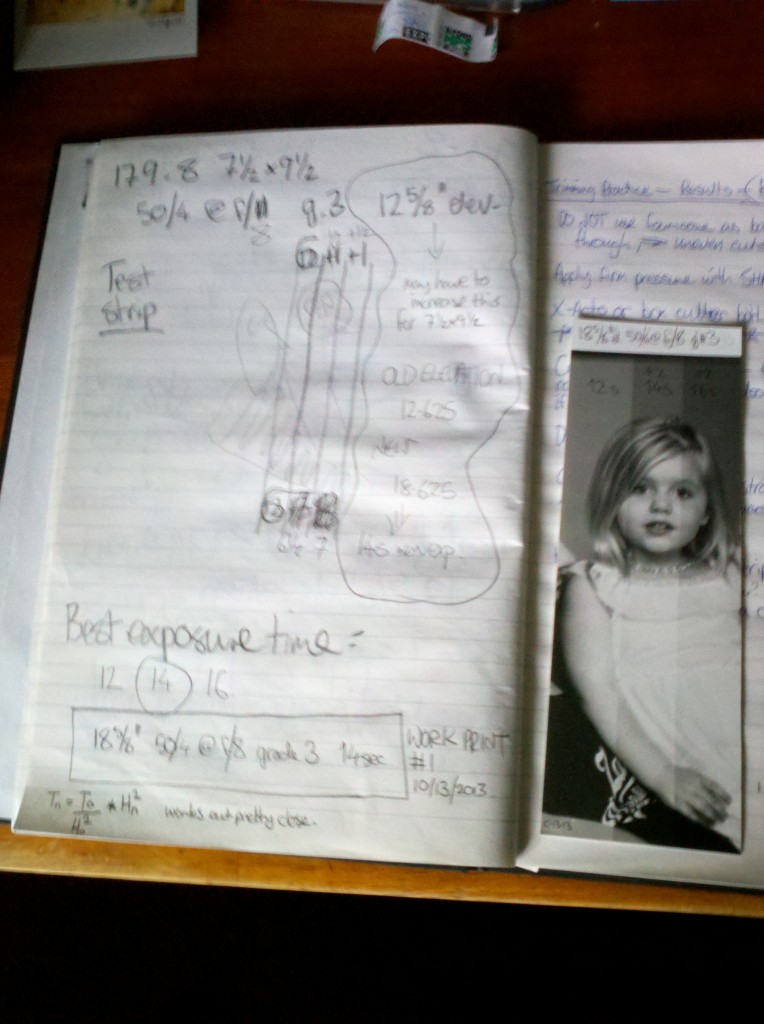
Darkroom log, stardate 101313. More cropping and a slightly larger image area means a higher elevation on the enlarger head, which needs to be compensated for. Also, see where I wanted to make my test strips compared to the actual strip.
To help confuse matters, I had decided I needed a much tighter crop on the area of interest than I had set up in the first couple of test strips. This would mean raising the enlarger head to increase magnification. The wrinkle here is that changing magnification affects exposure. There is always the same amount of light passing through the lens at a given aperture, but as the image is made larger or smaller on the easel, that light is spread out over a larger or smaller area. Lower magnification = more light concentrated on a given spot, higher magnification means the opposite.
So, my exposure time would increase, but by how much? Well, if you’re just moving between standard sizes while keeping the same crop, it’s quite easy, each size step is one stop of exposure. 2″ at 4×6 would be 4″ at 5×7, 8″ at 8×10, 16″ at 11×14 and 32″ at 16×20, assuming no other variables change.
But what if you change the size arbitrarily, as I just did? Well, fret not, for there is an equation for that. Actually there are two, but the one I used is the one which uses enlarger elevation for the calculation.
New_time = (old_time / old_height2) X new_height2
In my case, I knew that a time of about 6.5 seconds might be about right for the old enlarger height setting (12.625″) and f/8, so I made the adjustments I needed to the image crop on the easel, then checked my new height: 18.625″. The Beseler 23C series makes this a breeze, as it has a height scale on one of the vertical supports. Just read the scale and note it down (my ex-high school example did come with the pointer missing, nothing a bit of matboard cut into a triangle couldn’t deal with though).
So my equation looks like (6.5 / (12.625 * 12.625)) * (18.625 * 18.625) and spits out a new time a fraction longer than 14 seconds.
Taking this and running with it, I went 2 seconds either side, for a 12/+2/+2 test strip sequence. I was able to position the strip so that I had a whole tonal range covered, from white areas I wanted to retain detail in through to dark areas I wanted right on the edge of full black. The resulting test strip looked like this:
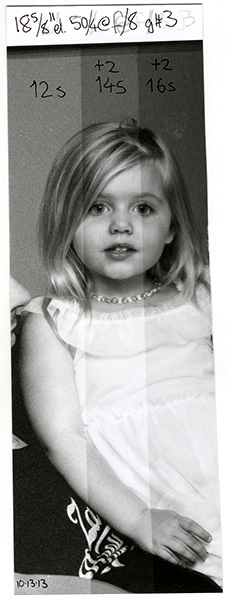
The third and decisive test strip. Exposures of 12, 14 and 16 seconds taking in the entire tonal range of interest. 14 seconds looks best to me. Also, when I was moving the masking card to cover the middle strip and make the final +2 seconds of exposure, I must have jogged the paper slightly in the easel (or bumped the easel), the effect that caused is most visible in the hand at bottom right.
As soon as I pulled the test strip out of the fixer tray and hit the main room lights, I knew 14 seconds would be the first work print’s exposure time. Sometimes you just know it right away.
So that’s what I did, and here’s the work print I ended up with.
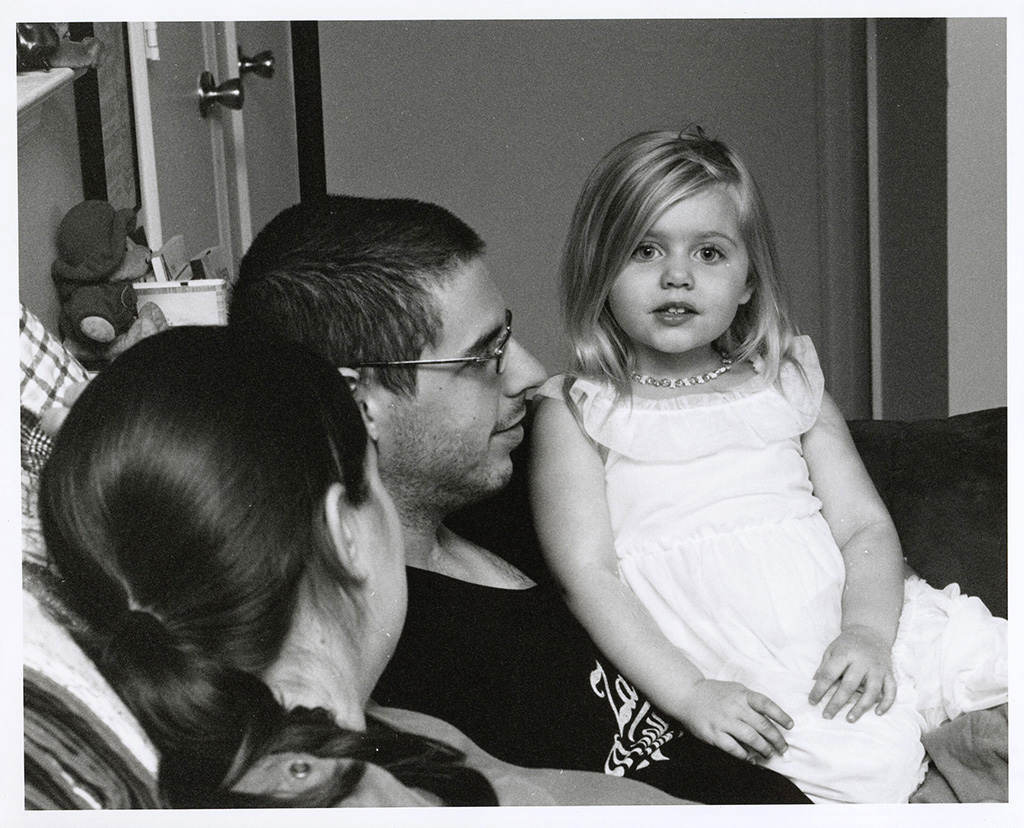 Not too shabby for a straight print from a type of negative which is not strictly intended for easy darkroom printing. I’m on the fence over whether it might benefit from about 1 second more of exposure time or not, but, ya know, it’s not meant to be a fine art print and under typical room lighting it looks good; for the purpose I have in mind, it will be ideal.