It’s hip to be square, or so they say. At least that’s what I keep telling myself as I work with 6×6 and enjoy the difference in compositional technique compared to rectangular formats.
Now I don’t always print square, but for the photos I would declare as “fine art”, square is apt to be my default. I’m a semi-generalist where photographic subject is concerned, but it’s all tied together by the common elements of black & white and the square format.
That makes my usual print sizes somewhere in the 7.5 x 7.5 and 10.5 x 10.5 region (on 8×10 and 11×14 paper respectively). The work prints on 8×10 get filed as-is, with notes scrawled in tiny text using a 0.1mm technical pen in the wide bottom margin. Final prints get a slightly wider bottom margin to allow a signature but need to be trimmed down to size.
Which is where I’ve run into problems, but fortunately they’ve been easy to fix.
Do use the right tools for the job.
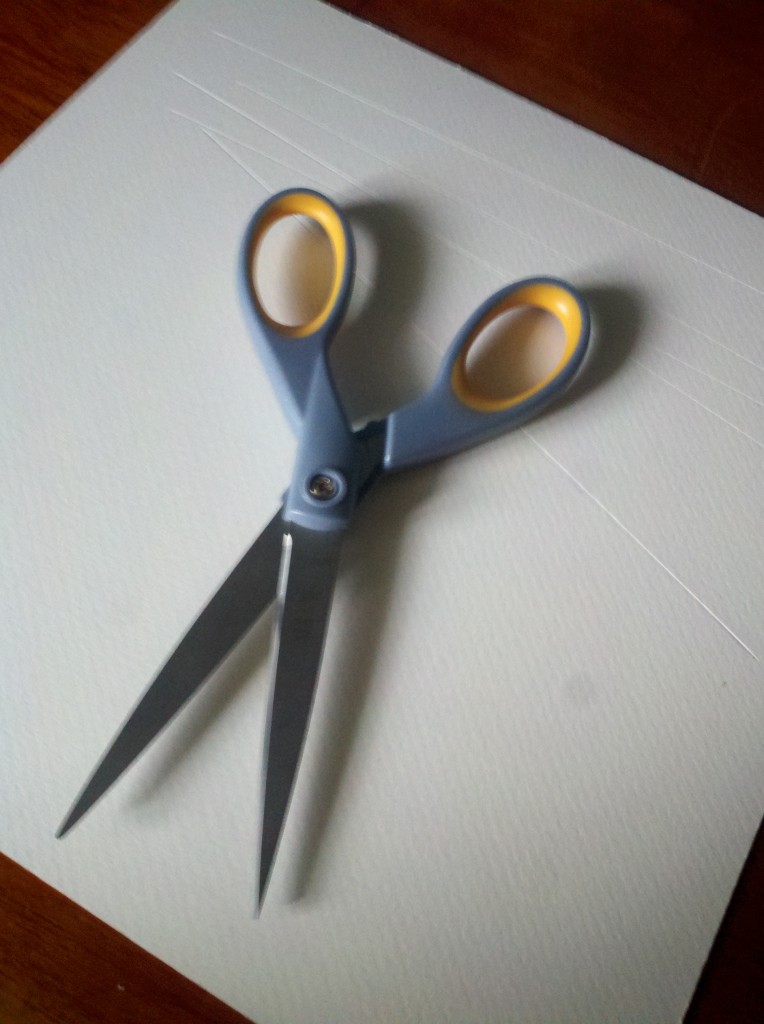
This is *not* the aforementioned “right tool” for this job.
My first attempts involved slow and careful use of scissors. No, just no. Not only is it ill-advised to run with scissors, trimming your fine prints with them is just as bad an idea if my experience is anything to go by. They’re fine for rough-cut test strips, and chopping developed rolls into strips of negatives. Perfectly straight cuts will elude you like Ahab’s white whale.
Cutting surface is also important.
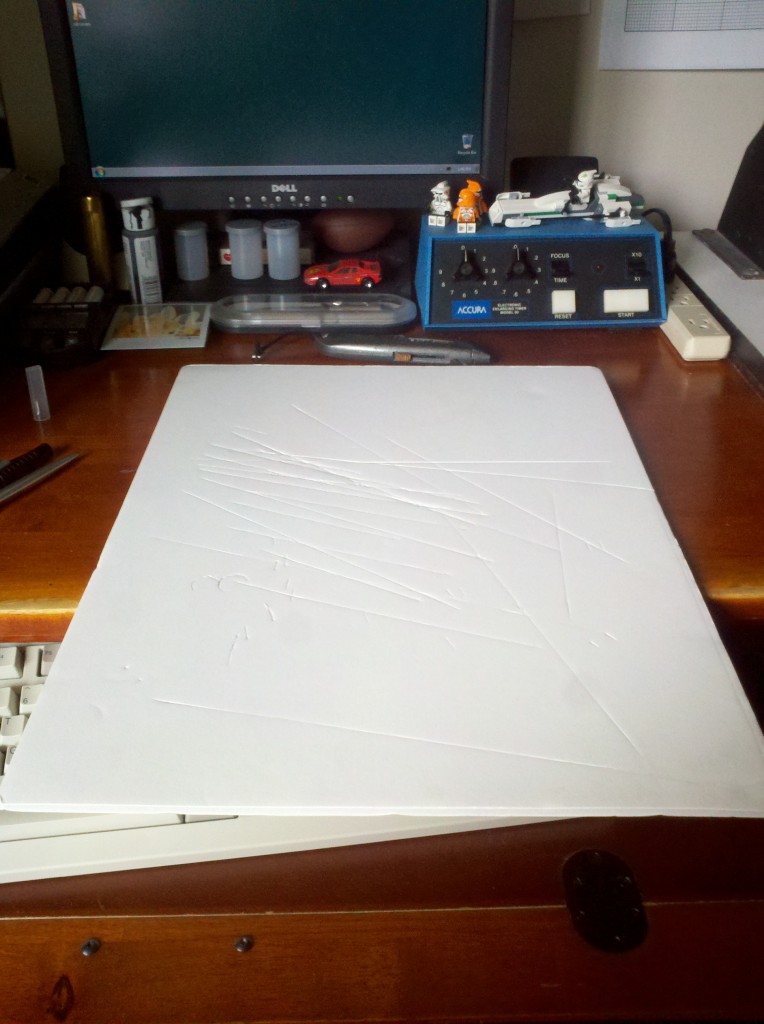
Also wrong.
I was using this big ol’ hunk o’foamcore as a cutting surface. This is nearly as bad an idea as using scissors, but not quite as bad an idea as just cutting your work area to crap. The blade meets pressure right up until it breaks all the way through the thick paper surface of the board, then it falls like a rock into the much softer foam middle. Not good if you want to be sure of a nice straight, even cut. Use scrap matboard, illustration board, or one of those fancy self-healing cutting mats instead. No nasty surprises unless you’re so ham-handed that you cut all the way through and into your desktop. Your prints will thank you.
I have a handful of tools which I wanted to try using for my cutting and marking up.
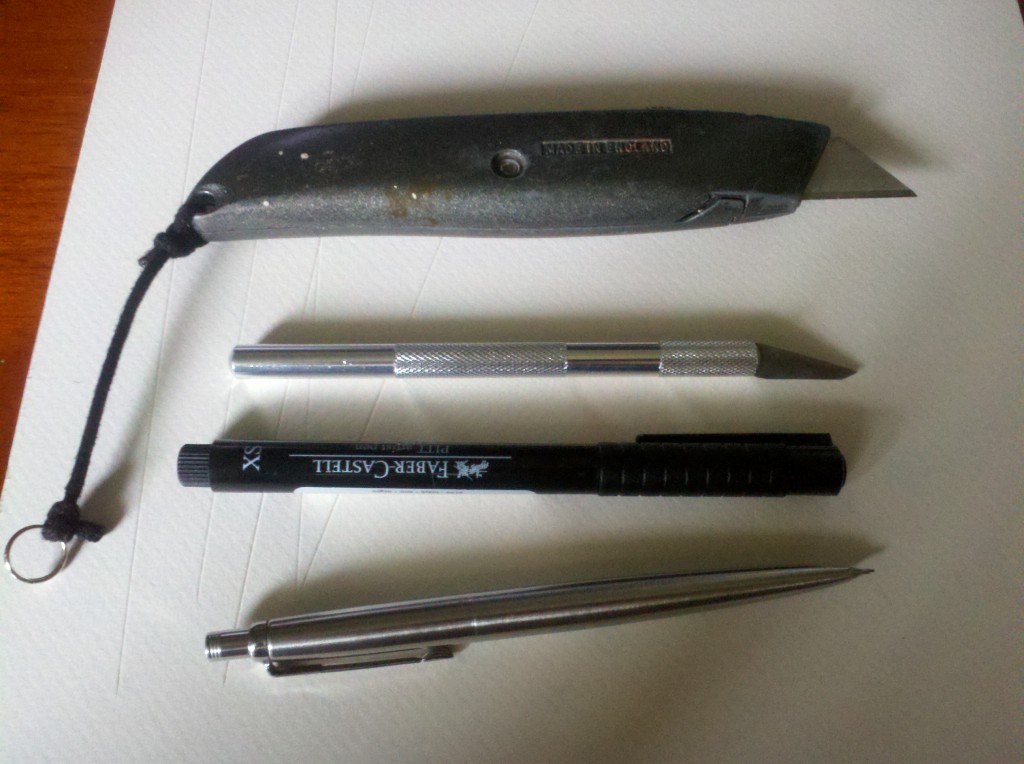
The important thing is the sharpness of the blade. Dull blade = dull cuts. The Stanley knife at top works well for me, allowing me to make good straight cuts in one swipe. It also makes straight cuts through mat board with ease. The cheap nasty x-acto rip off below it doesn’t work nearly as well and usually doesn’t get through in one stroke, but will find use when I’m ready to play around with custom cut dodge and burn masks that don’t need to be too exact or “nice”. It came with a crappy blunt blade installed, but at least the first spare blade in the package was sharp.
Below those are my Pitt XS technical pen (black India ink, 0.1mm tip) used for signatures, work print notation and marking where to make a cut (pencil won’t write at all on the emulsion side of resin coated pearl or gloss photo paper, or even fiber-base glossy) and my trusty old Parker 0.5mm mechanical pencil which isn’t much use here but muscled its way into the photo anyway. They’re resting on some scrap mat board used as a cutting surface. I forgot to include the cork-backed 18″ aluminum ruler I use. Derp.
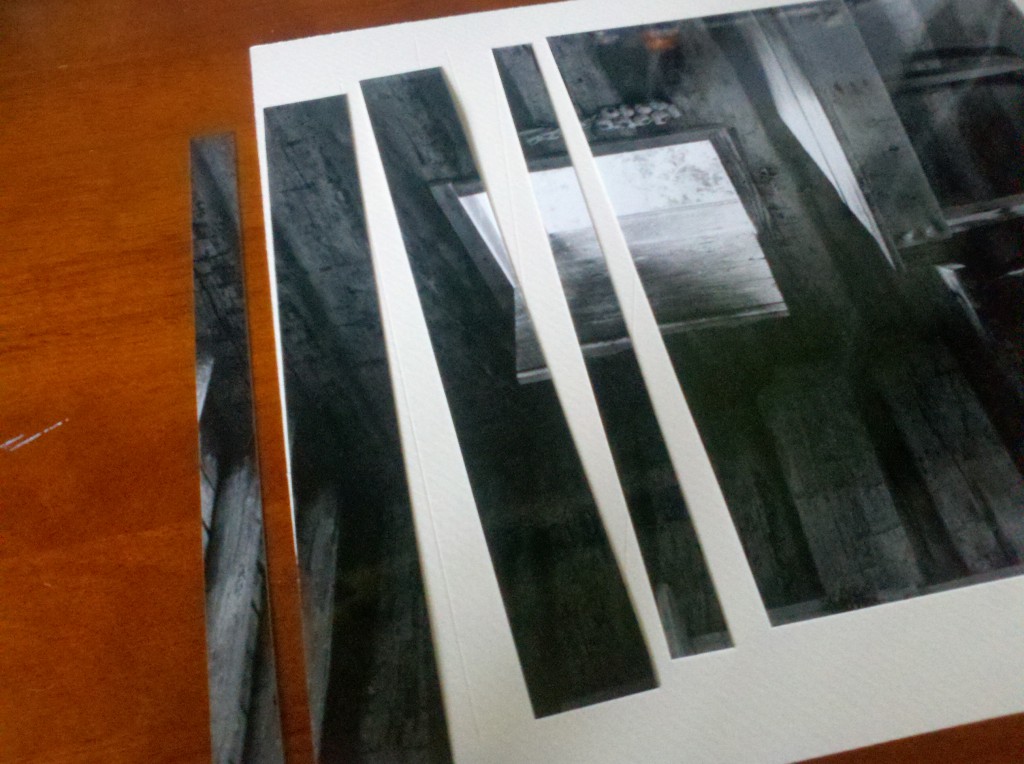
I…WILL…CUT YOU!!!
My unfortunate test subject, which died so that others may live. Extensive testing suggests that I need to use a mat board or other very slightly yielding surface under the print, measure and mark the trimming point in ink, then use my sharp box-cutter blade with firm, even pressure and a smooth stroke along the straightedge to cut in one go (if I have to go back over to finish the cut, the chances of an uneven cut increase dramatically, but they also increase if I am too heavy handed; this is where a rotary cutter would be more appropriate). Plenty of downward pressure on the straightedge to keep it from slipping. Consistently better results seem to be gained by cutting through from the front of the print, so I must take care to ensure the cork pad on the back of the ruler and the face of the print are very clean. No skratchee-de emulsionski…
There are still better ways to do this, of course. As I mentioned, a rotary disc cutter should be a better choice than the box cutter and there are other increasingly sophisticated (and increasingly expensive) gadgets beyond that which would make this very easy indeed. But I don’t have much storage space and I certainly don’t have much budget, so I wanted to see if reasonable results could be obtained using existing tools, and they can be. Eventually, I’ll splurge on a rotary cutter and replace my bits of scrap mat board with a proper cutting mat, but for now, I’ve got a workable solution.