In a previous installment of “Paul vs The Negative”, our protagonist emerged victorious from the darkroom, clutching 3 decent-quality final prints made from a badly exposed Kodak BW400CN negative.
There is a problem with those prints, a problem which I’ve been fortunate to have avoided so far, despite my darkroom also doing duty as kitty toilet (yay, fine clay dust and cat hairs everywhere all the time!) The prints have a lot of very obvious places which need spotting. To complicate matters, this print is on resin coated pearl finish paper, fixed in a hardening fixer. Apparently, I really like a challenge…
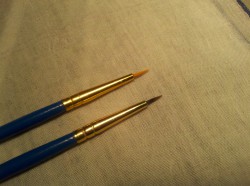
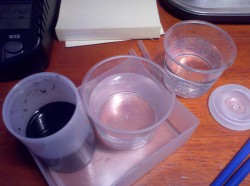 For this first go at spotting, I opted to attempt cleanup on the first work print I’d made using existing supplies: bottled black India ink and a cheap 10/0 spotting brush. This is not an approach I’ve been able to find much information about online, just about any reference to print spotting with India ink was about how to use the dry India/China ink sticks plus gum arabic, just like Weston used to.
Straight India ink from the bottle wouldn’t work; I’d played around with that already and found that it forms a very obvious raised matte patch. Tonal control is also next to impossible.
So instead I made a whole series of different dilutions to get a range of grays, which after some experimentation turned out not to be entirely necessary, at least this first try.
 What I settled on as I worked the test print, and which I used for my first final print, was having a 1:30-ish dilution of ink into distilled water. This proved to offer a good degree of tonal control. Pick up a brushful of the dilute ink and it’s very dark, but blot it out on paper and the tone lightens up quickly. By careful blotting, I can fine tune very quickly to get a tone which will work for the spot I want to hide.
I also found I could, with some care, undo a botched spot by using a clean brush with plain water to re-soak the spot, then very carefully picking up the water with a dry brush, taking the ink with it. Best of all, the India ink is acid-free, archival and light fast, so it’s going to stick around and not cause any problems. Using distilled water should help too.
At normal viewing distance and angle, I can’t tell the light and midtone areas have been spotted at all, and I know where the bodies are buried. Only the darkest spots are relatively easy to find, and again that’s not something which I anticipate will cause problems under normal conditions.
I may adjust this as I go along. I can see maybe having a range of dilutions for different tonal areas. 1:30 seemed a good overall compromise, but I found it necessary to make several passes over the really dark spots with this dilution and the really light areas proved tricky because the brush was just about dry by the time I’d blotted it out to the right tone. As I refine this I’ll play around some with making differing tones to see if that works better.
 Â
 
Before and after: these were the worst of the white spots on the print. I’m reasonably happy with how this turned out for having no experience of spotting a print before. If you look at the full-size versions you’ll see the spotting is by no means perfect. Fortunately it doesn’t have to be; it only has to stand up to scrutiny under normal viewing, not magnified to where the full print would be almost 4 feet across, which is roughly what the full-size scan of this section amounts to. Those thumbnails, by contrast, aren’t far from actual size on my display.
I think I’ve found my print spotting technique and best of all it uses materials I bought locally (not so easy in a mid-size second-tier market)! It’s not any cheaper than purpose-made spotting dyes, but I can’t buy those locally at half a dozen different places. I’ll have to try it on some glossy-finish prints next, those are said to be notoriously difficult to spot.